Bài này chúng tôi hướng dẫn bạn làm thế nào để sử dụng Hibernate Tools tạo các file mapping (hbm) và annotation từ các table trong database một cách tự động.
Lưu ý: trước khi tiếp tục bạn cần phải cài đặt Hibernate Tools theo như hướng dẫn trong bài Cài đặt Hibernate/Jboss Tools trong Eclipse IDE
Các Tool được sử dụng trong bài này:
- Eclipse kepler 2
- MySQL 5.0
- JDK 1.8
Nội dung chính
1. Hiển thị Hibernate Perspective
Trong Eclipse, tại menu bar, chọn "Windows" –> "Open Perspective" –> "Others".
Tại đây, thực hiện double click vào "Hibernate" hoặc click [OK] để hiển thị Hibernate Perspective ra giao diện chính của Eclipse.
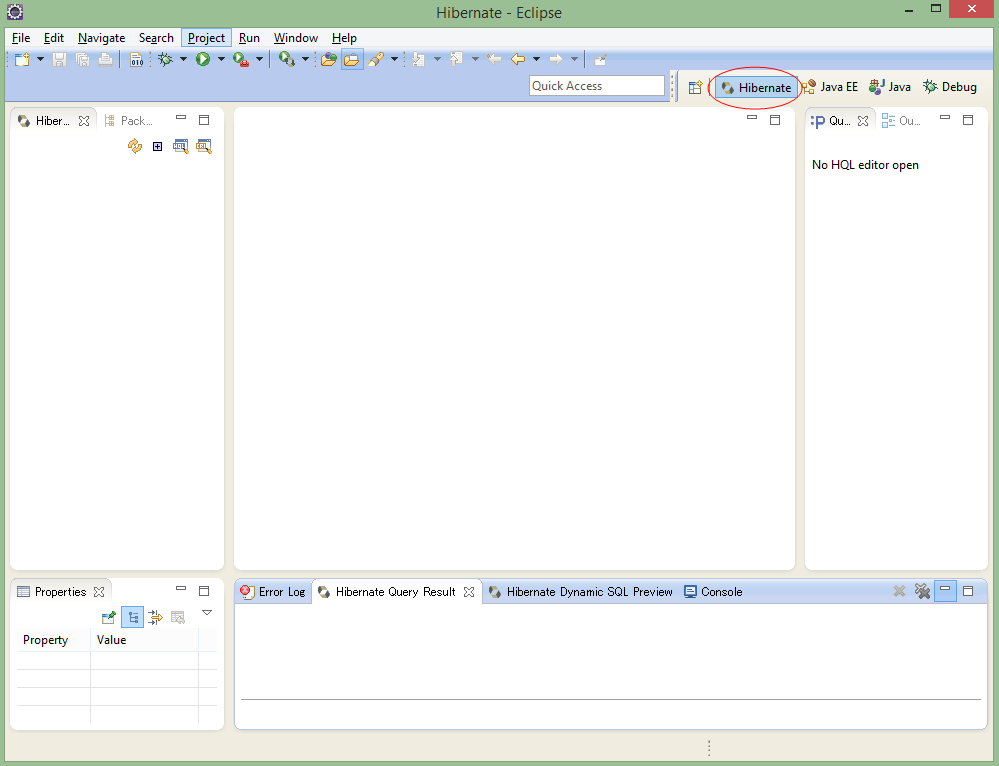
2. Tạo Hibernate Project
Tạo project bằng maven có cấu trúc như sau:
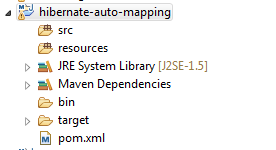
File pom.xml
<project xmlns="http://maven.apache.org/POM/4.0.0"
xmlns:xsi="http://www.w3.org/2001/XMLSchema-instance"
  xsi:schemaLocation="http://maven.apache.org/POM/4.0.0
    http://maven.apache.org/xsd/maven-4.0.0.xsd">
  <modelVersion>4.0.0</modelVersion>
  <groupId>hibernate-auto-mapping</groupId>
  <artifactId>hibernate-auto-mapping</artifactId>
  <version>0.0.1-SNAPSHOT</version>
  <!-- dinh nghia cac thu vien -->
  <dependencies>
    <dependency>
      <groupId>org.hibernate</groupId>
      <artifactId>hibernate-core</artifactId>
      <version>3.6.3.Final</version>
    </dependency>
    <dependency>
      <groupId>javassist</groupId>
      <artifactId>javassist</artifactId>
      <version>3.12.1.GA</version>
    </dependency>
    <dependency>
      <groupId>mysql</groupId>
      <artifactId>mysql-connector-java</artifactId>
      <version>5.1.6</version>
    </dependency>
  </dependencies>
  <build>
    <sourceDirectory>src</sourceDirectory>
    <plugins>
      <plugin>
        <artifactId>maven-compiler-plugin</artifactId>
        <version>3.3</version>
        <configuration>
          <source />
          <target />
        </configuration>
      </plugin>
    </plugins>
  </build>
</project>
Định nghĩa file hibernate.cfg.xml
<?xml version="1.0" encoding="UTF-8"?>
<!DOCTYPE hibernate-configuration SYSTEM
"http://www.hibernate.org/dtd/hibernate-configuration-3.0.dtd">
<hibernate-configuration>
   <session-factory>
   <property name="hibernate.dialect">
      org.hibernate.dialect.MySQLDialect
   </property>
   <property name="hibernate.connection.driver_class">
      com.mysql.jdbc.Driver
   </property>
   <!-- Assume test is the database name -->
   <property name="hibernate.connection.url">
      jdbc:mysql://localhost/testdb
   </property>
   <property name="hibernate.connection.username">
      root
   </property>
   <property name="hibernate.connection.password">
      1234567890
   </property>
   <!-- List of XML mapping files -->
   <mapping resource="Employee.hbm.xml"/>
</session-factory>
</hibernate-configuration>
3. Tạo Hibernate Configuration
Trong Hibernate Perspective, right click và chọn "Add Configuration…"
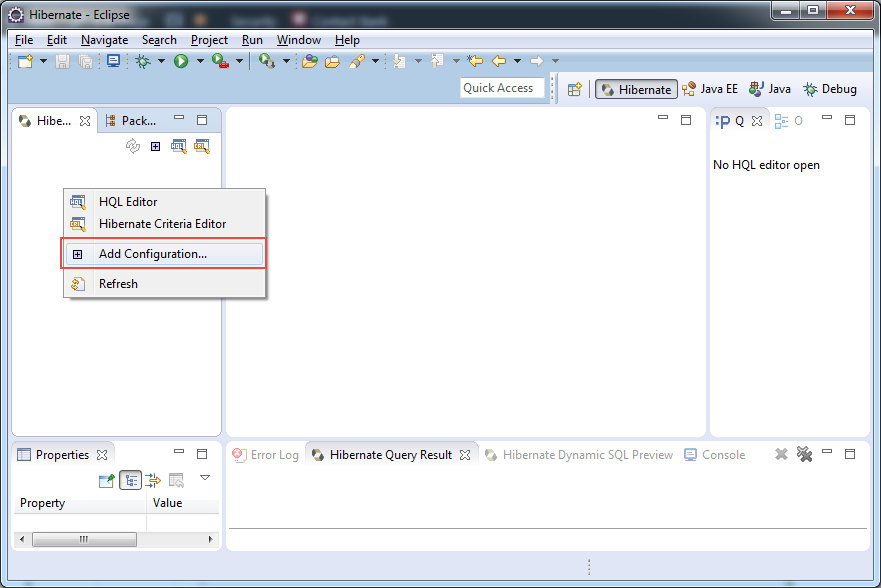
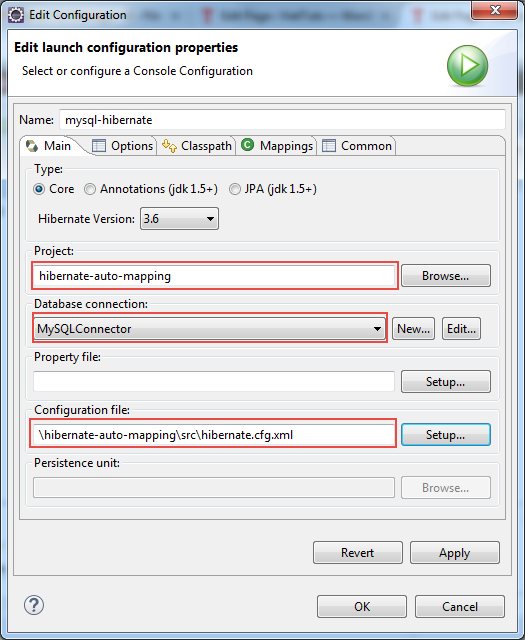
Tại "Edit Configuration" dialog
- Tại hạng mục "Project", click button "Browser..." để chọn project
- Tại hạng mục "Database Connection", click button "New" để thiết lập kết nối đến database của bạn. Lưu ý: trong hướng dẫn này chúng tôi đã tạo ra một database connection có tên là "MySQLConnector", bạn cũng có thể tạo ra các database connection cho riêng mình.
-
Tại hạng mục "Configuration File", click button "Setup" để tạo mới hoặc sử dụng file cấu hình hibernate "hibernate.cfg.xml" đã tồn tại trong project
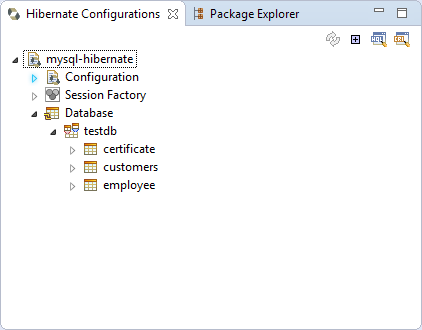
Xem danh sách các bảng trong database của bạn tại "Hibernate Perspective"
4. Tạo Hibernate Code một cách tự động
Đến bước này là bạn đã có thể tạo ra các file mapping (hbm) và annotation, bạn cũng có thể tạo ra file cấu hình hibernate "hibernate.cfg.xml" nếu như nó chưa tồn tại.
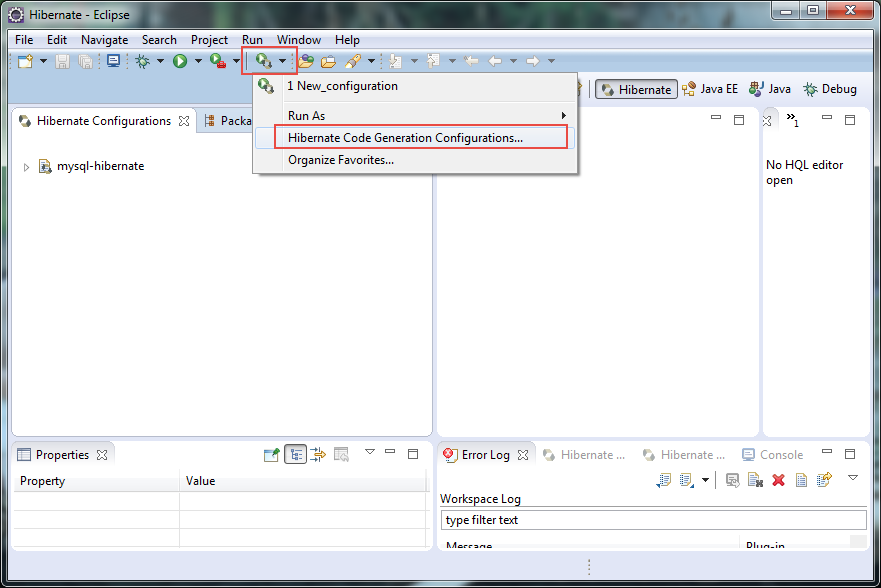
Click vào biểu tượng "Hibernate code generation", sau đó click "Hibernate Code Generation Configuration".
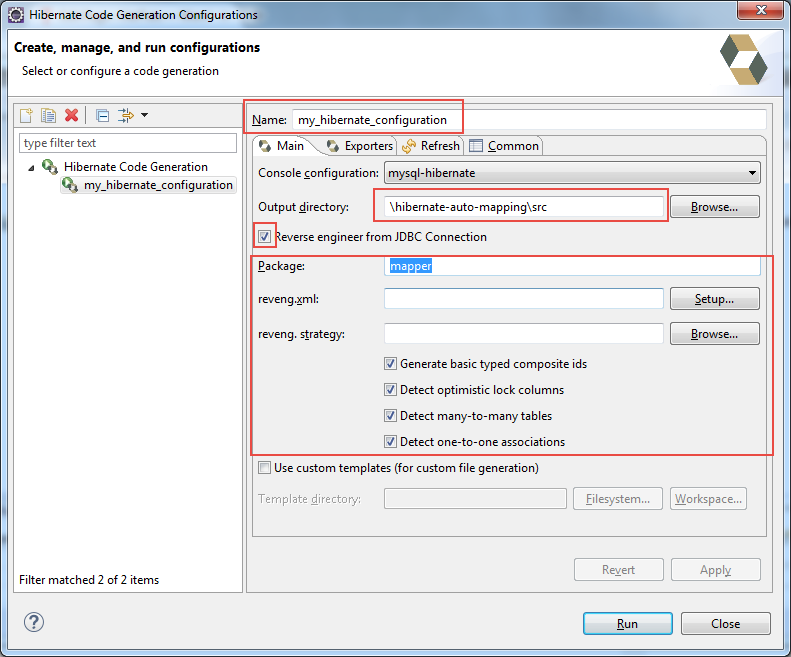
Tạo new configuration:
Nhập hạng mục Name, sau đó chọn tab "Main", rồi nhập hạng mục "Output directory" - nơi lưu các file được tạo ra, và check vào tùy chọn "Reverse engineer from JDBC Connection".
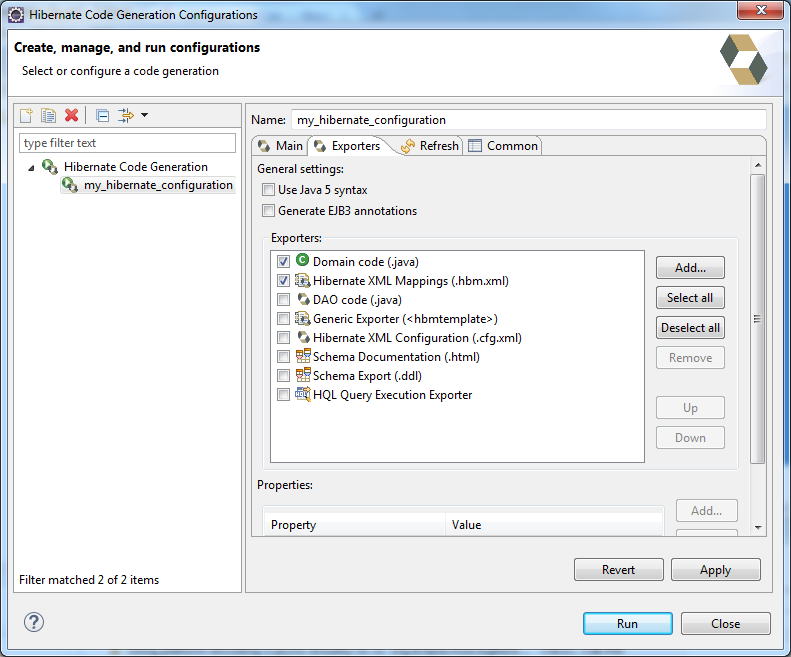
Tại tab "Exporter", chọn những gì bạn muốn Hibernate Tools tạo ra cho bạn chẳng hạn như Entity, mapping file (.hbm.xml) , DAO, annotation code, ...
Cuối cùng, click button "Run"
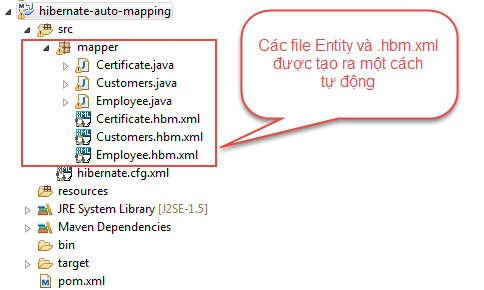
Kết quả:
Chúc các bạn thành công!
